Monday, March 26, 2012

R1100S winter rebuild - part 6

This is one of the last update on the BMW's rebuild ... well hopefully. In this issue of "how to start a rebuild way too late and make it last 'til summer is gone", you will read the joy and pain coming along with the rear end fixing. It just started with the simple intention of changing the rear shock, but then the idea of fixing the exhaust end cans - they're jumping in their slots on every bump - popped up. I could not imagine this would end up in yet another broken part in desperate need of a welder.

Ok, then let's start with the part that ran rather smoothly. The rear wheel's been removed to give extra working room and also to make the rear dead shock easier to remove. Then the swing arm has been cleaned and the shock swapped for the tasty Nitron which is been set up 12mm longer to 325mm in order to raise the bike.

The knackered eleven-year old Showa

Why not clean parts while there that accessible ?

Old compared to new

A serious upgrade over the old Showa


And while the rear wheel was off the bike, the bolts on the end cans were much more visible and the problem easier to locate on the exhaust. At first I thought all I had to do was to secure the retaining bolt with a lock washer and try to tighten the bolt a little harder. But then it all went wrong as I discovered what the real issue was. The main bolt screws into a nut with a shot thread. But wait there is more to that than just a nut with a shot thread as the latter is welded to the end cans support bracket and cannot be simply replaced with a new one. 

 
Left : the end cans of the Laser race system. Right : this nut in the middle is dead.


The bracket needs a welder. "Allo, Metal Machines ? Yeah it's me again ...". The guys looked like they were flooded with work and told they could not fix the parts as quickly as I imagined. I guess I'm giving this build another week ...

Sunday, March 18, 2012

R1100S winter rebuild - part 5

Next move of this rebuild is about putting the front end back together. With fork parts all over the floor, some repainted, some new and ready to fit, it's time to reassemble the whole lot. But before event thinking about bolting the the fork legs back on the bike, there are a couple of tasks waiting to be accomplished : 
- fork needs to be serviced, 
- upper and lower yokes need their ball joints replaced,
- and new front shock has to be fitted.

Let's start with the front shock. The nicely engineered Bitubo finally gets its chance to replace the old looking Showa. It's been set up to standard trim for compression, rebound and spring preload, but it's been lengthened 6mm. It's one of the benefits of this shock swap, I was really into trying to find a front shock which length could be changed. So the Bitubo ticked all the options where even the Öhlins does not allow a length change.

The poor Showa next to the new Bitubo

The new shock in place

Next were the yokes and their ball joints. As proper tools were missing to extract the ball joints from the yokes and to screw them back to the correct torque figure, these parts were taken to the nice and knowledgeable guys at Metal Machines. It took them less than 1 minute to unscrew the ball joint from the lower clamp, but they gave up on the top clamp, smartly stopping before things go terribly wrong ... well at least for the bike parts, because one of the guys almost broke a finger working on that. They finally advised I should go to a BMW shop, which I can't blame them with as to every specific parts, their specific tools. So it's finally a mechanic at Europ Touring BMW dealer in Arras who replaced the ball joints in less time than it  took you to read this sentence.

The yokes with brand new ball joints

Eventually, the BMW emblem bought months ago has found its place

To the fork rebuild now. One of the legs had a fried join, making oil spill all over the tube. There was only  this small part to replace, but the fork has been completely serviced anyway : oil, joins, and washers were changed with new material.

Old and worn parts

Nice and shiny new ones

The reassembled fork legs look like the following. What you seen on the first picture is a long plastic tube that fills the fork internals so only 170ml of oil is needed. This system has been kept on R1100S up to 2002 before the idea of having this tube in the fork has been abandoned.


With all the big parts ready or even fitted, the front end could be put together again starting with the yokes, then the fork legs and finally putting back the mudguard, front wheel, steering damper and brake calipers. The same steps in pictures :


Again, new parts where the bike deserves it


The R1100S has a front again, but the rebuild process is still far from being complete as coming posts will confirm.

Wednesday, March 14, 2012

R1100S winter rebuild - part 4

The fork legs and the bottom yoke are back home. I brought them back from the paint shop and they are far from the sorry state they were in.


Polimetal59 did a good job restoring these parts. The paint looks bright, should last longer and offer a better protection against winter assaults.
Now let's clean everything before the real suspension rebuild starts.

Sunday, March 11, 2012

R1100S winter rebuild - part 3

One of the main reason why the R1100S is undergoing such a rebuild process is because it deserved to be improved a bit in the suspension department. Front and rear shocks both need to be changed, even if they're not completely knackered and still doing a descent job. And since most of the parts implied in the suspension process have to be taken down the bike to access these shocks, the rebuild is also a good opportunity to restore some of them.

So off went the front brake calipers, wheel, mudguard and steering damper (yes, the sporty BMW has one). The fork legs then slid through the yokes, making the bike kind of levitating on a hydraulic jack.


Years of cold winters and salt completely ate up the paint's varnish (where there is paint) on the the bottom triple clamp and the bottom end of the fork legs. The forks were already off and the yokes had to be removed anyway in order to replace the ball joints, so why not have them repainted ? They've been dropped at the friendly shop Polimetal59.


The parts are due for next week. Looks like this build will take much more time than expected.

Monday, March 5, 2012

R1100S winter rebuild - part 2

Along with the mods and repairs initially planed, there were also smaller jobs to perform on the R1100S while the fairing and fork legs are off. Thus, the now useless front ABS sensor had to go and a mocked-up O2 sensor would replace the redundant item.

This latter part has been made from the original O2 sensor with a bit of cutting and obstructing. It still needs a bit of finishing and in the end it'll stay a fix in the rough, but that will make it cheap.


Friday, March 2, 2012

R1100S winter rebuild - part 1

It started rather late for a real winter rebuild and it was about time. With a full load of parts waiting on the shelves and as much problems and mods stacking in my mind since I've got this bike rolling, it couldn't wait any longer. So last week, I finally made up my mind and decided I would try to work on the R1100S in the small, dark and mainly cold garage. 

The main goal for this winter was to replace both shocks and change the right leaky fork seal. But hey, while the bike's completely stripped off, why not add a couple of mods on the list ? So in are a battery swap which requires it to be relocated (as well as part of the wiring loom), a Rapid Bike module relocation, a fork rebuild (complete from oil to triple clamp bearings), ABS and O2 sensors definitive removal. That should keep me busy for a couple of weeks.

Let's start with the battery, Rapid Bike and loom relocation. It all started because the standard 18A battery is much too heavy and now useless since the ABS's been removed last year. So I looked what kind of battery fit R1200Ss and found they're running 14A ones which are not only smaller but mainly would be a full 2kg lighter. Also the main issue since I've installed the Rapid Bike unit is that it's not properly attached to the bike. It's still able to move under the tank.

Once the bike was stripped, the first task was to empty the battery tray. Then the next couple of hours have been spent trying different fitment configurations for the battery, Rapid Bike unit and ABS electronic module.


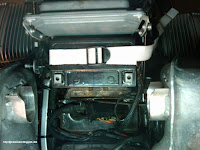
Having tried many fitment scenarios, I decided I would strap the new battery just behind the Motronic unit, leaving the former battery space to the Rapide Bike box.


Then I had to find a way to relocate the wiring loom so that the main and ground wires could reach the battery. And while trying and guessing, I thought a good refresh of some parts of the wiring loom would be welcome, so in went a a reinsulate session too (hence the black and red tape). Here's how it looks in the end : the battery slides in what used to be the ABS servo location and the Rapid Bike unit is packed together with the ABS electronic module where the battery was formerly strapped.


Will they move while riding ? Will the battery drain all its power trying to start the big flat engine again and again ? I certainly don't know yet as only a road test will tell, and this is way down low on the To-do list at the present time.